This blog is about all my other crafts projects: doll clothes, dollhouses, paper models, sewing, knitting, crocheting, card weaving and whatever else I might try. Posts before 2020 are mainly about miniatures, while posts from 2020 onwards will be mainly about life size projects. In 2021-22, I will also write about my studies to become a dressmaker.
Any Amazon links in this blog are my Amazon referral links and as an Amazon associate I earn from qualifying purchases.
Customizing Petite Catwalk Kitties is fun. Here is what I did with a Chase doll. First, I opened her hair and there sure was a lot of it.
Then she got some temporary tattoos, which I covered with satin sealer to prevent damage to them. I painted her top, because it would have been hard to make a fabric top that would not have covered the tattoo on her back. She also got an eyebrow ring, which is piece of gold plated metal wire bent to shape and pushed through the vinyl (first I made a hole with a needle). At this point, I had cut the hair a little shorter to make it easier to handle her, but final haircut was not decided yet.
She originally had green shoes, but as I had an Anika doll I was going to customize too, I swapped their feet and Chase got boots. They were originally white, but I painted them black, added some glitter to the flower patterns on the boots and covered everything with sealer.
And here she is finished. The skirt is made of black leather and the jewelry from thin copper sheet. I decided to cut her hair fairly short and I think it turned out very nice.
I had to take a break from the miniature projects, because the vision in my left eye got so bad that I couldn't do anything very small. It's improving now and I've been able to do some customizing for Catwalk Kitties, but mostly I'm still crocheting as that is fairly easy even with limited vision.
I've been crocheting for the Baha Cat as she's so small it won't take much time to get things finished. The first thing I made was a winter outfit:
That hat was easy to make, so I tried another one. This time in neon pink as I've had the yarn for some time and could never figure out what to do with it. I just bought it, because it was so irresistible. The pictures below show the structure of the hat: first a couple of rows around the head and then the front and back are made separately.
There's no picture of the finished hat yet as I'm going to go out for a new photo shoot as soon as the weather permits and take photos of everything I've made since that first green outfit.
My latest 16" doll is Tonner's Miss Piggy. I got the basic version as that was available for order within EU (which means no customs handling, but just like ordering from a Finnish shop). First, a picture of her with Savoy to show the scale.
I rarely leave my dolls in their original outfits and that's true for Miss Piggy as well. The first creation for her is a crocheted dress made of 100% wool. I had already used the yarn for other projects, so there wasn't enough for anything longer than this.
Miss Piggy isn't as curvy as other 16" dolls, so the dress was easy to make. In the hem, there's two rows with addition on every third stitch and two rows with addition on every second stitch (I hope you understand what that means, I'm not really familiar with the English terminology of crocheting).
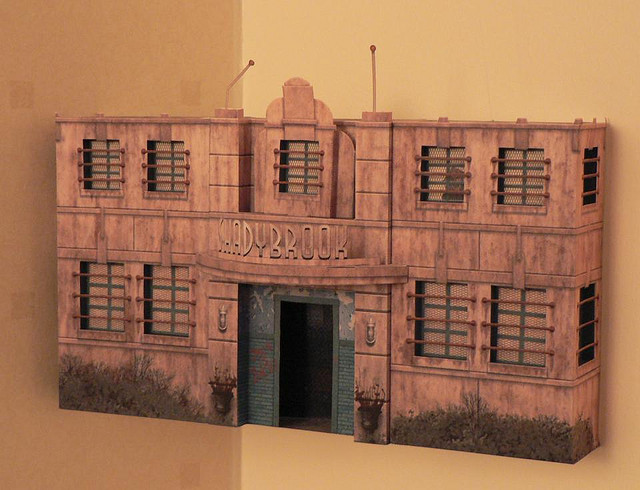
These little cats came with Petite Catwalk Kitties. As I bought a couple of Chases, I got two similar cats and decided to use them as decorations on both sides of the door of the Birchfield house.
Here I have attached them into a piece of wood using mirror mounting tape to make painting easier. As the tape is fairly thick, the cats do not touch the base and that ensures the paint won't make them stick to it.
The next stage is painting the cats with a "stone" color. Anything from off-white to beige and even some darker shades are suitable for this. I used solvent-based paints as the cats are made of hard plastic and can take it.
The final stage is blackwashing. Take some white spirit (or turpentine) and add a drop or two of black paint in it (if you use water-soluble paints, use water instead). The amount of paint depends on how much of it you want on the surface of the statue, that is, how old and dirty the statue should look like. This takes some experimenting to get it right. Then just apply a coat of the mixture to the statue and let it dry.
I used a dollhouse wardrobe to make a large dollhouse for a 1/12 scale dollhouse. I added shelves to create the separate floors and added one wall upstairs to divide it into a bedroom and bathroom. Then I made holes in the back wall for installing lights, which are a string of Christmas lights in 1/12 scale.
The next picture shows how the lights were installed. As I only needed 10 lights inside the house, I attached the extra two lights under the house to provide additional lighting for the room in which this dollhouse will be placed. Of course, I could have made two holes for the living room, for example, and installed 4 lights there.
Then I furnished the house. I used pieces of pictures found in magazines for wallpaper and other decorations. The furniture is made of cast metal. Some pieces were ready painted when I bought them, some I have painted myself.
I found a method for keeping the fridge doors closed. A hobby shop had this thin magnetic sheet you can cut to desired shape and size. Here is the fridge painted and magnets in place. When you cut the magnets, you need to cut one side first, then place it against the sheet to find a place for cutting the opposite part. The last piece missing from the kitchen was the oven. I made it using balsa wood. The basic structure is very simple. The glass on the oven door is a piece of overhead transparency. The hinge is made of thin cardboard. That is the easiest way of making a hinge and it is durable enough after it has been painted as the oven door is very light. I used the same method for the fridge. I used magnets for keeping the oven door closed. The cooking plates are pieces of black rubber and the grey buttons are from buttons of an old remote control. I know there are different types of ovens, but I'm used to having an electric one, so that was the easiest for me to make.
None of the dollhouse fridges I have was suitable for the dollhouse I'm building, so I decided to make one specifically designed for this house. It's a good idea as I have made the kitchen cupboards myself and plan on making the oven as well.
The kitchen looks like this:
I used a variety of materials for the fridge as there was not enough left of any one material. So, there's cardboard, foam core, balsa wood and a piece of some harder wood. The structure is basically that of a regular cupboard, except the shelves aren't as deep as they could be. This is because there must be room for the shelves inside the door. This is the inside of the door. The (approximately) 45 degree angle on one side is there to make sure the door can be closed. Another option would be to make the shelves a lot shorter. The fridge isn't finished yet. Next, it needs to be painted and some sort of handles attached. I also need to figure out how to keep the doors closed. I'm thinking of using small magnets, if I can find ones small enough.
This has really nothing to do with crafts, but this is just one of the things I do. Usually I write and shoot photo stories, but this time I rewrote a discarded part of a photo story to work as an audio story.
The events that have taken place before this story can be found in the photo stories "The Angel" (pictures 1-51; for picture 1, click here) and "Facts of Death" (pictures 10-30; for picture 10, click here).
The leather vest is very easy to make. It only requires cutting the material using the pattern and sewing (or gluing) the shoulder seams. If you use fabric, select something that won't fray, such as felt, or treat the edges with Fray Stop.
As you can see, the front of the vest won't close. You can make it close by modifying the front edges. First draw the desired shape in the pattern, fold the paper in half, and then cut the pattern. This way, the front parts will be identical.
I made a dressing gown for my Sybarite doll using a shirt I bought from a second hand shop. I cut the parts so that the sleeve cuffs and hem are from the hem of the shirt. I also got the edges with buttons and button holes directly from the shirt, which was nice, because I hate sewing in buttons and I am really bad at making button holes. The collar is a little piece from the shirt collar, so that also saved some work.
I like the neckline as it reminds the neckline of some historical dresses. I think I'll have to try this again later with fabric that is not this transparent.
Below are some of my dolls modeling the outfits I have made. The dolls are from left to right: Chinoiserie Red Moon Silkstone Barbie, Model of the Moment Daria, and Spa Giftset Silkstone Barbie. The outfits are from left to right: Editorial Suit, Arts in the Afternoon, and Cocktail Fashion. The patterns for each outfit also include a pattern for a hat, but I have not made those.
Here is a back view of the same:
Side view:
I also took some pictures as I was swapping the outfits around. The doll with platinum blonde hair is Hollywood Royalty Lana Turner.
This outfit is called Retrospective:
The other outfits in the book are:
Holiday in Paris (a bubble dress),
Limelight (pull-on stretch velour dress with a double tulle flounce),
Best Bow (dress with fitted drop waist bodice with an attached full skirt and large fabric bow),
Basic Dress (dress made of two pieces, suitable for beginners),
Straight Sheath (A-line dress),
Woodstock (1970s style rib knit one-piece jumpsuit and long fleece vest),
Swimsuits (one and two piece),
Pink Punch (felt midi coat with matching mini skirt and satin shell top),
Gingham Dress (for the smaller busted fashion doll).
At the end of the book, there are instructions for scaling the patterns to fit 15-16" fashion dolls and instructions for making a hat using buckram.
I have made some shirts with iron-on transfers for the Baha Cat. My favorite is this one:
I resized pictures I had found in the web and created some myself from my own photos and printed them on a sheet of iron-on transfer paper (siirtopaperi). All you need is the paper and a color inkjet printer. The transfer paper is not cheap, but you can fit a lot of these tiny pictures on one sheet to save material.
The sheet on the left in the picture is a black and white test sheet I printed before printing on the actual transfer paper. This way, you can catch any problems before final printing.
When printing on the transfer sheet, you need to select the appropriate paper type in the printer settings as the printed image needs to be a mirror image of the original (as you can see in the picture above). This setting can be found in Printing Preferences (Windows XP) or something similar. The settings and available options vary depending on the printer, but if you have a color inkjet printer, you should be able to find "Transfer paper" in the paper type list.
In clothes as small as these, it is best to iron the transfer picture onto the fabric either before cutting the fabric or after cutting but before sewing. The instructions for ironing may vary between different manufacturers, so you should follow the instructions included in the transfer paper package.
Here is the doll wearing another shirt with a transfer picture:
The pattern scanned in the previous post was for Baha Cat's trousers. The pattern can be found on my home page and here are the instructions for it.
I prefer patterns with as little and as easy sewing as possible, so these are not too difficult to make.
Start by folding the fabric right sides together and cutting the pieces using the pattern.
The pieces are mirror image of each other. Turn and sew the lower edge of the pieces first. How much you turn the edges depends entirely on the desired length of the trousers. Use the doll to check the length.
Then sew the inseam and press the seams open.
Fit on the doll to check that the size is right.
Turn the trouser legs right side out and sew the front seam and about 1/3 of the back seam. This is the most difficult part to sew using a sewing machine and you need to be very careful that the fabric stays straight and you only sew the edge without making any extra folds in the fabric.
Turn and sew the edges of the back opening.
Turn and sew the waist. Fit the trousers on the doll to check how much to turn.
Attach a snap. Attach the upper half first, put the trousers on the doll and check where the other half should be placed.
Here are the finished trousers on the doll. These are actually a bit wider than the pattern. You can easily adjust the width of the trouser legs. Just keep the upper part as it is and make the lower part wider or narrower.
These trousers were made of stretchy fabric using the exact pattern that is in the PDF file. They look a bit baggy, because I used elastic band on the waist instead of leaving an opening and attaching a snap.


 ). All you need is the paper and a color inkjet printer. The transfer paper is not cheap, but you can fit a lot of these tiny pictures on one sheet to save material.