Friday, December 25, 2020

New hot glue gun

I happened to see this in Lidl a couple of days ago as I was buying groceries. I was so sick and tired of fighting with the cord of my old hot glue gun that I got this. It was 14.99 €, which isn't too bad.


Here is the glue gun out of the package and after a bit of use. What I can already say is that I should have got one of these earlier. I thought hot glue was messy and difficult to use, but it wasn't about the glue, I just had a crappy glue gun. This is just great.


For comparison, below is the old one. I assumed it was good, because of the manufacturer. I mean, I've got a hole puncher manufactured by Kinzo and it's great. However, this one has one basic flaw: it doesn't get hot enough. That's the main reason behind all my problems with hot glue. The cordless one gets to 170°C, and the difference is noticeable. I don't have any papers that may have come with the old one, but I'm sure the temperature is lower, because the glue just stays too thick. I always thought it was supposed to be that way, because this was the first hot glue gun I've ever had. Now I know better.


Thursday, December 24, 2020

New headband for the Kindi Kids doll

As I seem to be making an entire outfit for the doll, I thought I might as well make a new headband for her too. I used the original to draw a paper pattern and then cut the piece out of a metal sheet (0.3 mm thick).


Cutting the metal was easy with these shears. I've been wondering about the manufacturer as there are no markings in these. Did a Google search and found a picture of similar shears, but no info on who makes these. However, the picture was from ebay, so I found out that these sell for about 10 €. I don't remember what I paid as it was over 15 years ago.


I bent the metal piece using the original headband as a guide.


Then I covered the upper surface of the metal piece with felt using hot glue.


The next stage was cutting a piece of felt that would cover the inside and gluing it in place.


I glued some ribbon on the upper surface using again hot glue.


The final stage was gluing one of these paper flowers to the headband.


The text in the package sounds really good, but I'm a bit skeptical. I tried finding verification for this, but all searches only found online stores selling this stuff. You'd think that they would make a big deal out of the story, if it's legit, so I still have my doubts.


Here is a picture of the finished headband on the doll. Metal should keep its shape fairly well, and gluing the felt onto it when it has been bent should also add some tension that'll help to keep the shape.


Wednesday, December 23, 2020

Necklace for a doll

In the previous post about the coat for Kindi Kids dolls, the doll had a pearl necklace with a star pendant. That was my first experiment with new material, a strand of plastic pearls. There's 2 meters of it in the roll, so that's enough for quite a few necklaces.


The star is one from this package. These decorations are just the right size for larger dolls.


I used metal wire to make a ring for attaching the star to the string of pearls (sewing thread would work just as well).


The closing mechanism gave me some trouble. I thought of all sorts of elaborate alternatives, but ended up gluing a loop of thin rubber band to the other end of the strand with hot glue. This loop goes around the first pearl in the other end to keep the necklace closed.


Here is the doll again, wearing the necklace. The pearls would be too big for most dolls of this size, but the proportions of this doll are so strange that the pearls look just fine.


Tuesday, December 22, 2020

Another try with the coat

After figuring out what went wrong the first time, I modified the pattern. The main change was removing the shoulder seams and having side seams instead. This way, the sleeves are much easier to sew in place. The back piece is also a bit wider than it was originally. However, the front is the same width, I didn't make any changes to it.

Here is the main part of the coat with edges treated with textile hardener. This fabric frays very easily, so the hardener was useful as I didn't want wide seam allowances.


The best thing about this pattern is that you can use the sewing machine to sew the sleeves in place. It is also much easier to get everything aligned correctly this way.


The last part is to sew the side seams. The next picture shows the coat without any trimmings, but I plan to use some sort of ribbon for the edges. That means hand sewing the ribbon to cuffs. If you sew it before sewing the side seams, even that can be done with the sewing machine. I just couldn't decide what I wanted, so I finished the coat and will think about the ribbons later.


Edit: You can find the PDF file containing the pattern for this coat on my web site.

Saturday, December 19, 2020

Coat for the Kindi Kids doll

I decided to try making a coat using the dress pattern as a starting point. I shortened it, moved the opening to the front, rounded the edges of the front pieces, and made a pattern for the sleeves. In this picture, the sleeves are too long. The doll's arms are really short and the hand size means the sleeves need to be quite wide. These sleeves were a bit too narrow, although the resulting coat can be put on the doll, but only just.


I treated the edges of the fabric with fabric hardener (basically glue), because this fabric frays easily. After that was dry, I sewed some ribbon to the cuffs to make them look neat without turning the fabric.


Then I sewed the sleeve, side and shoulder seams. Before that, I made sure the hands would go through the arm holes and sleeves. It was a tight fit, but manageable, although I knew the pattern would require modifications after checking all the things that were wrong with it.


The final step was sewing the sleeves in place and adding ribbon to the remaining edges. I managed to get the coat on the doll, but while I was doing that, I also realized the back piece needs to be wider. This doll's arms aren't quite as bad as the Living Dead Doll's, but the hands are still quite far apart, making it difficult to put something like this on. See the Fashion Doll Shoes blog for the description of making the shoes.


Thursday, December 17, 2020

This counts as upholstery

I was looking at the chair I have by my sewing machine and realized it's one of the upholstery projects. Even smaller than the stool, but still upholstery. It's an office chair with the back rest removed. The reason I'm not using it by my desk is that the lifting mechanism is broken and it's permanently in its lowest position.

The seat fabric was black and not too worn, but I wanted something more colorful. The first thing to do was to remove the seat by opening some screws.


Then the plastic cover underneath the chair needed to be removed. Its only purpose is to cover the wooden board inside the seat and the stapled edges of the fabric.


In this case, there was no need to sew anything into shape, just get a rectangular piece and turn its edges under the seat and staple them there. The only reason I had to sew anything was that I didn't have enough of one fabric to do this, so I had to combine two with zigzag stitches.


Here is the result. It's been a few years since I did this, and the chair still looks nice. The stitches are holding well, and I don't expect this to need a new cover any time soon. The one thing that bugs me about this is that the center fabric is not exactly in the center. The left edge is wider than the right. It really makes no difference, but I can't help noticing it. You always notice the little details that didn't go exactly the way you planned.


Wednesday, December 16, 2020

Recycling the leather

I've been thinking about the leather I got when I removed the stool cover during the smaller upholstery project. There's quite a bit of it, and I want to find a practical way of using it. One of the ideas I had was to make a bag, but I already have one made of leather. My aunt made it and gave it to my mother and I got it when the house was being emptied for sale. It's probably made from furniture industry's leftover pieces and I'm its third owner so far, so it's a well recycled item already.


On the right in the picture are the pieces from the stool. The rectangular pieces (a few dozen) are from the sides and the rest from the top. The top pieces are thinner and more worn than the side pieces, so they're also softer. I like the worn look of the top pieces, but the area they cover isn't large, so they can't be used for anything big. Another restriction is that I haven't sewn leather with a sewing machine before, so I don't want the first project to be anything too complicated. I guess I'll just leave those pieces alone for now and try to figure out something useful.

I think these were originally pieces left over from making bigger furniture, because there was no need to have so many small side panels in the stool otherwise, considering the amount of work the sewing must have required. Then they served their purpose for over 20 years before ending up this way, waiting for their next purpose.

Tuesday, December 15, 2020

Variation of the Kindi Kids dress

I finished the dress shown in a photo in the pattern file for the A line dress


The patterns in the fabric required dividing the one piece pattern into three pieces. Also, this is 100% cotton, so fraying would have been an issue. That is why I decided to use a lining for the dress. I sewed the side seams and then sewed the resulting piece into a rectangular piece of the lining fabric. The sewing is easier this way as the fabrics stay flat against each other better. 


In the next picture, you can see which seams need sewing at this stage. The hole in the right edge is where you pull the entire thing through when turning it the right way round.


After sewing, I cut away the extra lining fabric and turned the piece. I also ironed it, because I wanted to make sure the lining wouldn't show.


I realized the shoulder seams would be really thick if sewn. So I decided to glue them instead. I used PVA glue and glued a piece of ribbon first on the outside and then, after the glue had dried, folded it on the inside and glued it there as well. This should be strong enough to form a shoulder seam. After the glue was all dry, I trimmed the ribbon so it was level with the edge of the armhole.


The final step was adding velcro closing on the back. The next photo shows the doll wearing the dress. For the shoes, see the Fashion Doll Shoes blog.


Monday, December 14, 2020

Housecoat/dress made of old flannel shirts

I had some old flannel shirts that had belonged to my dad. They were too big for me, so I decided to make something else out of them. As a starting point, I took a dress called "Lankku" (Plank) by Nanso. It's a good fit for me and very comfortable, so I used it to make patterns out of what was left of the old duvet cover.


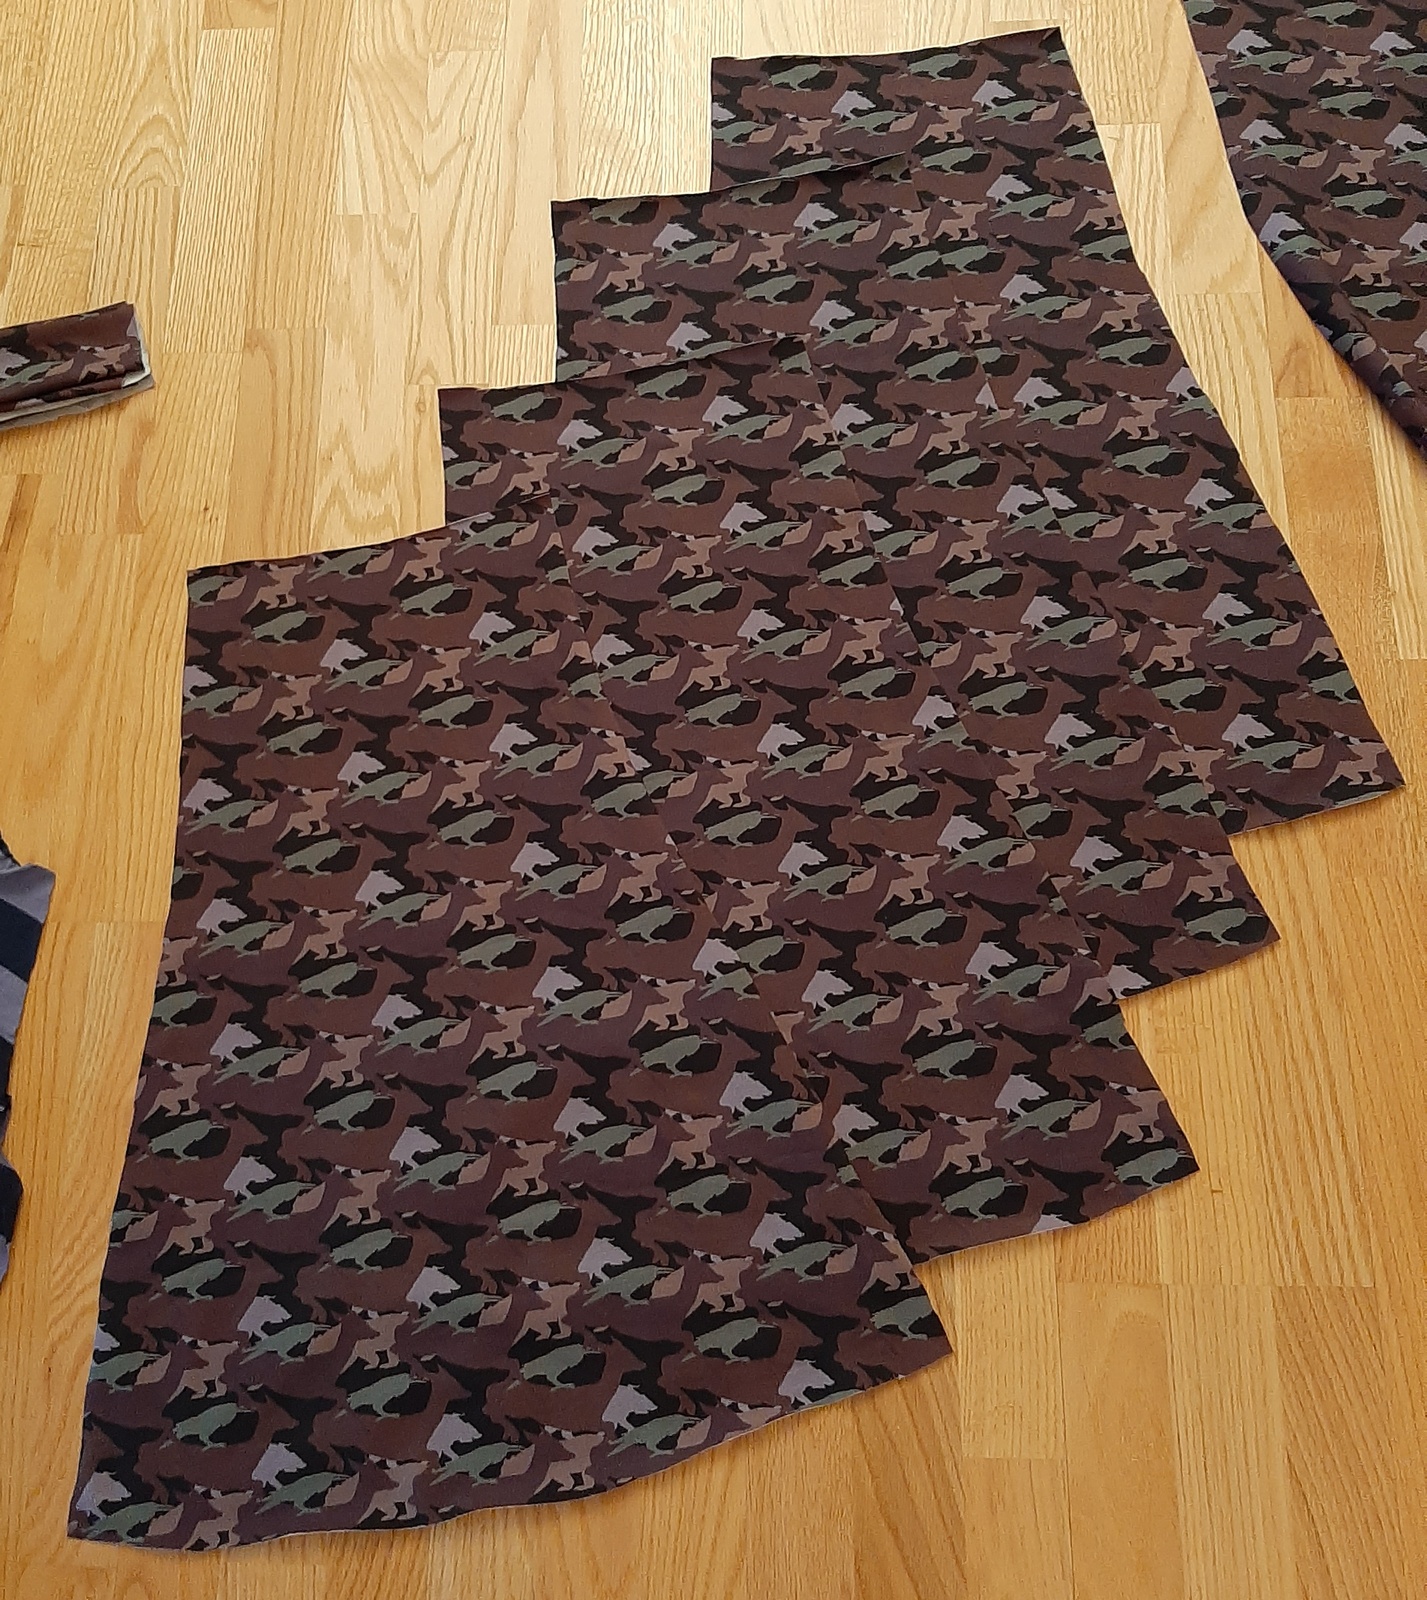
There was no way to cut entire pieces out of the flannel, so I divided the pattern into pieces and then cut pieces of flannel as shown in the next picture. These pieces took two shirts to make, so I knew at this point that I'd have to use the third one as well.


I combined the pieces by overlapping the edges and using a stitch that's meant for this kind of combining. The main thing I wanted was for the garment to be comfortable, so regular seams were out of the question.


When all these seams were ready, I used strips of colorful fabrics to cover them. It made the result neater, and it was also more fun to have some cute pictures as the flannel colors were a bit dull.


I used the third shirt for the sleeves and edges. Cutting usable parts of that shirt was a bit tricky as it had some paint stains, but I managed to avoid having any stains visible. I made huge pockets for this as they need to accommodate a mobile phone and all sorts of other stuff I carry around at home. (I don't expect to wear this when going out, unless it's just quickly taking the trash out.)


The last stage was sewing buttons and button holes. I remember sewing a couple of button holes with my old sewing machine, but not buttons (I don't think it had that function). Now I decided to try doing both using my current sewing machine.

This is the foot for sewing button holes. You put the button on the back where it defines the size of the button hole, and the machine makes the button hole automatically. I made 8 perfect button holes, and then the last one (closest to the hem) got messed up somehow. I removed the stitches for that one and decided that 8 buttons was enough.


Then it was time for the buttons. The instructions in the user guide were clear enough, and the next photo shows the first ever button I have sewn using a sewing machine. I wanted to practice first on a separate piece of fabric in case I mess it up, but it wasn't that hard, you just need to be careful in positioning the button.


So this ended up being the first piece of clothing with buttons that I have ever made without any hand sewing, all done with the sewing machine.


Here is the finished dress. The breast pockets are from the flannel shirts. For the white/grey one, I cut the shirt so that I'd get the pocket in the correct place. The other pocket is from the third shirt, and I cut it out of that one and sewed in place to this.


Sunday, December 13, 2020

Skirt made of the camo fabric

I bought 2 meters of the fabric, so there was more than enough to make a skirt in addition to the shirt. I used an existing skirt (photo below) for making the pattern, but this time the original item remained intact as it is in excellent condition and I'm still using it.


I used fabric from the repurposed duvet cover to make the pattern. The new skirt consists of four of these panels.


Here are the four panels for the skirt. Again, I aligned the colors vertically.


The first thing to sew were the vertical seams. Here three of the four have been sewn. I used the stitch number 15 for these (see the chart in the earlier post). The next stages were the final vertical seam and the waist band. I folded the fabric at the waist and left room for a rubber band. The original skirt also has a rubber band on the waist, although I used a narrower one for this. I used stitch number 12 for the waist.


The final piece was the hem for which I used stitch number 11, which shows very little on the outside. It requires this special foot to keep the fold of the fabric in the correct position so that only every fifth zigzag stitch catches the fold.


Here is the finished skirt. In this case I was wearing the shirt I made earlier, but I'm not planning to use these together regularly. 


Now I know the pattern is fine, so I can use it later for making another skirt once I find fabric I like. That's really one of the main problems with buying skirts, either the design is for people half my age or the pattern is what the manufacturers assume middle aged women want to wear. The skirt in the first photo in this post is the latter, but in this case I like the design and pattern. The other knee length skirt I have bought is all black and I haven't used it, I bought it just in case I happen to need a black skirt. The rest are dresses as for some reason, dresses seem to come in much nicer colors and patterns. But they all have floral patterns, so the skirts I'm going to make will have something else.