Showing posts with label furniture. Show all posts

Tuesday, December 8, 2020

Chairs repainted

I thought I had gone through all of the repaints, but there were still some photos of chairs I painted at the same time as all the other stuff. It's amazing how much I could get painted with three small cans of paint.

First, there is this kitchen stool that's at least 20 years old, maybe older, but didn't really look like it. The only thing showing age was the slightly worn varnish on the steps and the top level. However, I wanted to take the opportunity to paint it as I was painting other furniture.


Then there were these two chairs. Not quite as old as the kitchen stool, but more worn. There's so much light colored wood in my home that some variety doesn't hurt, so these ended on the list of items to be painted.


Here is the painted kitchen stool. I used the same paint as for the sewing machine table. You couldn't really guess the age of this now, as good as new.


For the other two chairs, I used a colored varnish, which required way too many coats to look nice, but finally it got to the point where I was satisfied with the result. Here they are drying after the final coat of varnish. 


Then there was also this small table. The table top was in a fairly bad condition, so it needed painting, this wasn't just because I fancied a change. I didn't bother to paint the legs, because it would have been a bit complicated as this is a folding table. It was complicated enough to varnish the folding chair in the picture above.


Sunday, December 6, 2020

Additional parts for the table

The sewing machine table had a small wooden drawer under the table top. It was falling into pieces as all the corners were loose and only the bottom was keeping it together.


The first thing to do was gluing the corners with PVA glue. I left the original nails in place, tapping them in with a small hammer. I didn't think they would be much use otherwise, but they would help the pieces to keep their original alignment while the glue was drying.


The rails for the drawer under the table were also a bit broken. I could have made new ones, but I decided to try fixing these first and only make new ones if I had to.


The composite picture below shows the different stages of fixing the rails: filler applied (pictures 1 and 2), shaping the rails by sanding (pictures 3 and 4), and finally the result (picture 5), which isn't perfect, but works.


After everything was ready, the parts needed painting. It never stops amazing me what you can do with filler and then paint the result, and nobody can guess what's underneath.


Another issue was hiding cables. The dollhouse and table look so nice that it would be a shame to ruin the impression by having a bunch of cables lying around. The answer to that problem was using some leftover pieces to build a cover under which all the cables that don't fit in the space under the table can be hidden. The cover is made of pieces of wood and particle board glued together using PVA glue.


I painted the cover black, using what remained of the metal paint. It's not meant for painting wood, but it was available and I didn't want to throw away what was left. I always prefer using leftovers for other projects. When the paint was dry, I attached some stickers for decoration. Those were the only pieces I bought specifically for making the cover, everything else was leftover materials. In the photo below, you can see the cover as it looks seen from the front.


Here's view from the back. The back is open to allow access to the extension cord's power switch. The cover is taller than is needed for accommodating the cord and cables, but that is for ventilation. In a smaller space, the cables could get hot. Even with the extra space, I wouldn't recommend leaving the power on for an extended period and certainly not unsupervised. This works for the purpose it's used here, because the dollhouse lights are never on when I'm not at home.


Saturday, December 5, 2020

An old sewing machine table

This is the project that started all that repainting, the sewing machine table. I got it when my parents' house was put to sale, and it stood in my living room corner for a year before I got the motivation to do something to it. That was probably a good thing as it had been in a cold storage for some time, so giving it time to dry properly in room temperature couldn't hurt. The photo below shows the table as it was when I got it. Of course I cleaned it right away before letting it stand in my living room for a long time.


The sewing machine wasn't in working condition, so when I started the work on this project, the first thing to do was to remove it and the motor that was under the table. Seriously, that motor would probably have been a fire hazard, if I had been stupid enough to try to connect it.


Here is the table with all the unnecessary parts removed. The veneer in the front edge had suffered from moisture, so that was the first issue to be addressed.


First I sanded the front edge a bit and removed the parts of veneer that were totally loose, and then I got some filler to make the surface as even as I could.


Here is the result after filler and sanding. Not perfect, but I had to choose between leaving it a little bumpy and taking the risk of making a total mess. A little bumpy was the safer option, especially considering the purpose for which this table would be used.


The next stage had to be done in the balcony as there would be rust flying around. All the metal parts needed thorough brushing before painting. I used a wire brush to remove all the rust that I could remove. There was no need to get it all off, because the instructions in the paint can said the paint could be used even on top of rust. However, I wanted to remove everything that was coming loose easily.


This is the metal paint I used. I knew absolutely nothing about metal paints, but reading carefully the instructions in the can, I thought it sounded right. I didn't want any particular finish, just black color that would stick to the metal.


Here's a little time lapse clip of painting the metal parts.


The result looked nice enough. I applied two coats of paint, because the first one didn't cover everything evenly.


The foot pedal needed to be secured in place, so its front and back would stay off the floor. The original chain was badly rusted, so I bought a new chain and hooks to attach it to the loop in the upper right of the foot pedal. The chain was already black, but the hook needed to be painted.


Here is the table top before painting. It may seem strange to have a table with a hole in the middle, but this was actually perfect for the intended purpose as the space below the table level would hold cables nicely.


Here is the table all painted. You can see the chain here, attached to the foot pedal and going over the lower horizontal bar above it.


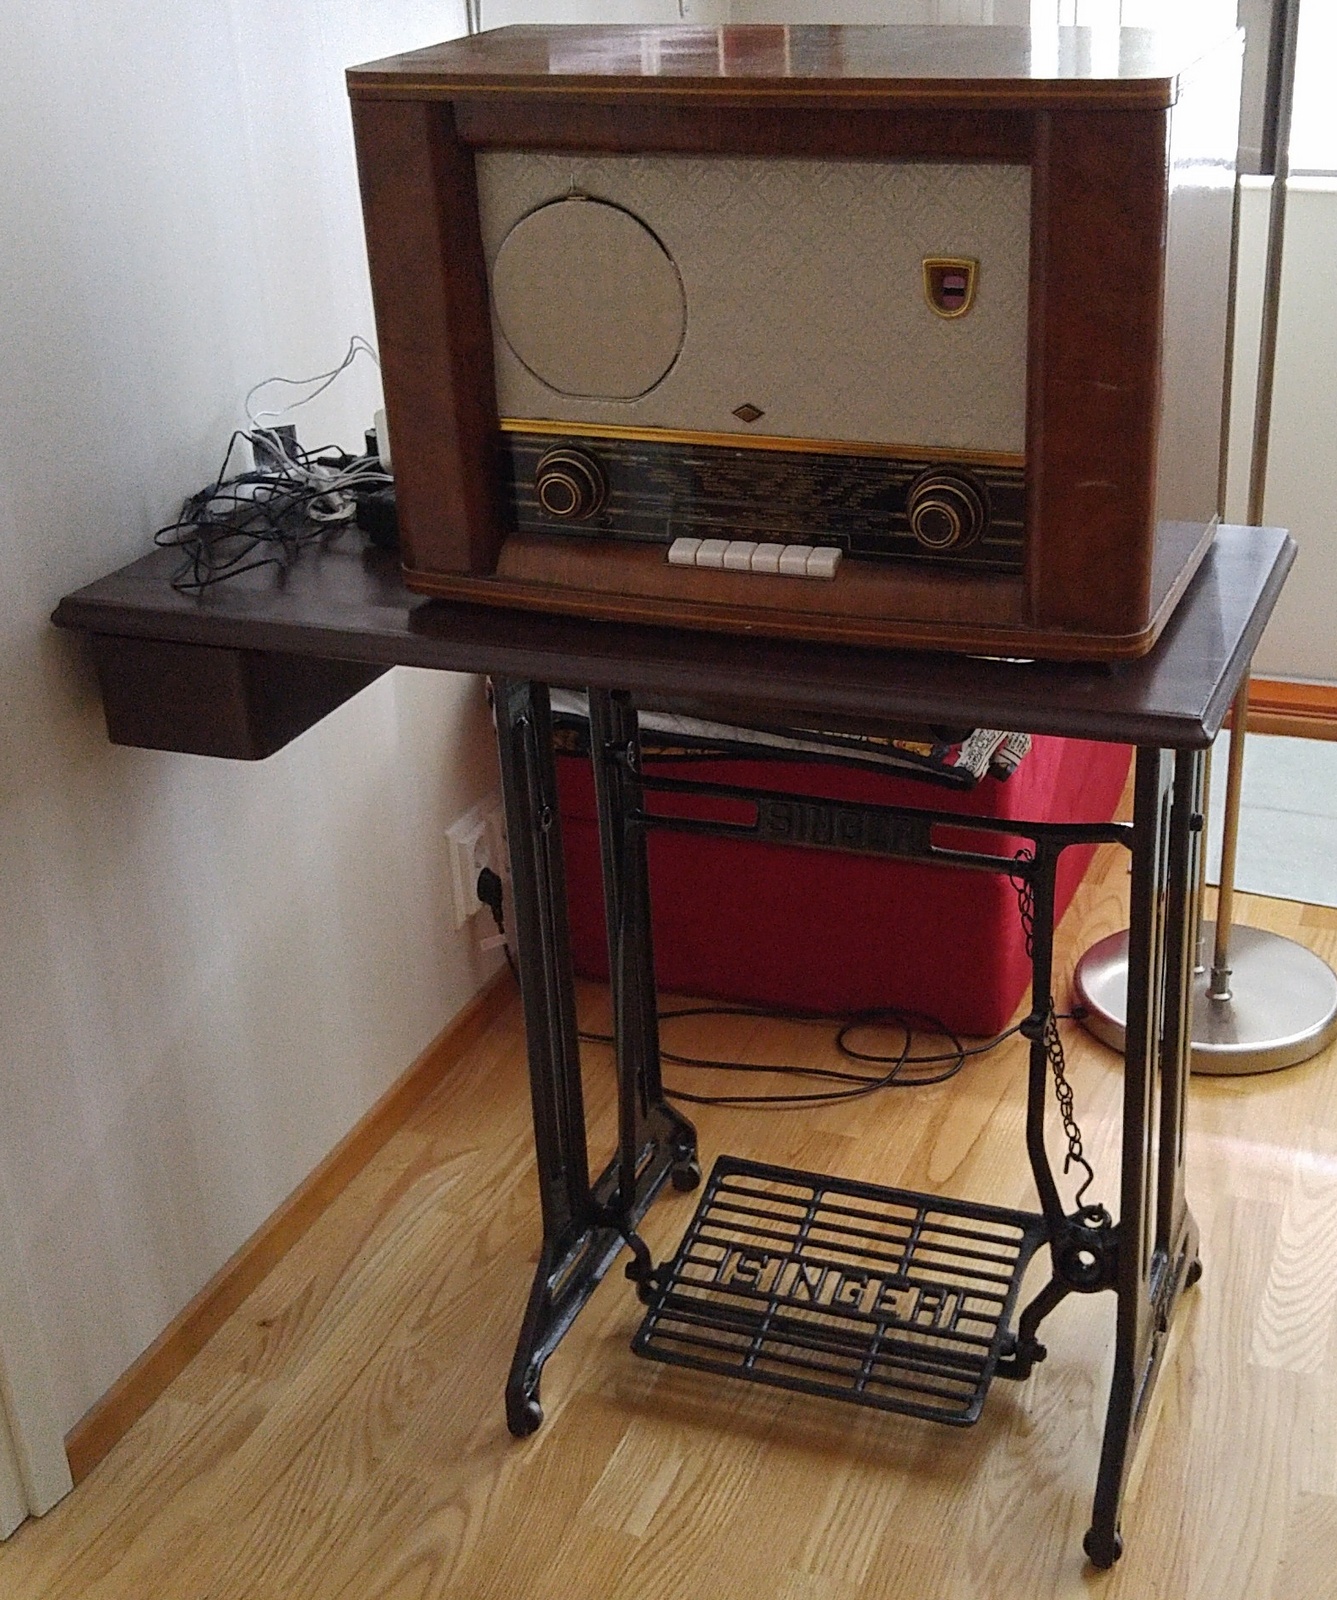
The planned use for the table was this. What looks like a radio is actually a dollhouse, and the old sewing machine table made a fitting stand for it. The project wasn't quite finished at this stage, but I'll write another post about the smaller stuff that needed to be done in addition to painting the table.


Friday, December 4, 2020

Repainting a small drawer

Here's another piece I repainted. I bought this new and used it as it is for some time, but decided to give it some color when I was painting all the other stuff.


I painted the insides of the drawers white, the visible outside parts red, and the rest of the outside parts white. I wondered if I was going too far with painting sides that wouldn't be visible, but apparently it's a good idea to paint all sides to prevent any warping.


I didn't paint the inside parts of the frame, because I didn't want brown streaks on the white parts, and that would have happened at some point.


After painting, I applied some stickers to the front of the drawers.


And here is the final result. The combination of red and brown works quite nicely, although it was brought on by the fact that those were the colors I had available. Of course this, the box on the back and the other small drawer under this one also fit together nicely when the color scheme is the same.


Thursday, December 3, 2020

Another repaint

This was originally a drawer on wheels, the sort you have under a desk. Made of white melamine covered board and practical, but boring. Since then, it has served in various other purposes, such as housing a PC.


I went through some old photos and managed to find a picture in which you can see this as it was originally, under the desk beside the armchair. The picture was taken 25 years ago as me and my then boyfriend moved to a new place. The rest of the desk is long gone now.


At some point, I was experimenting with glue varnish and decided that the white melamine could do with some livening up. I went through all the comics I had, and as I had purchased all of the Sandman comics as trade paperbacks and only had some in a magazine format, I decided to sacrifice those magazines. It's my favorite comic, and I picked some of my favorite parts from those magazines for covering the outside, leaving the inside white at that point.

That's how it stayed for years, until I had some other painting to do and decided that the inside could do with some livening up as well. I got red paint for this, because red is bold and goes really well with the outside design.

There was only one drawer left at this point, and I decided to make some shelves instead. I used leftover pieces from a DVD shelf I had taken apart for making a dollhouse. The easiest way to attach two pieces of board together is using the kind of metal pieces you can see in the picture below. They will remain under the shelf, not visible, so it doesn't matter that they don't look nice.


After attaching the pieces together securely, there was a gap in the middle. Some filler and sanding fixed that problem. If you get the surface even enough, you can't even tell it's two pieces once the shelf has been painted. And who's looking at the surface anyway when the shelves are full of stuff?


The lowest shelf in the next picture looks flimsy. That's because it used to be a drawer and have a front, but didn't anymore. (The holes in the back wall are from the time the PC was inside this. All the cables went through there.)


I realized the lowest shelf wouldn't hold anything heavy, so I removed the remaining sides and used them to create supports underneath to make a proper shelf. I just glued the supports in place using PVA glue, because any stress to the shelf would come directly from above, so nothing would be pulling the shelf and supports apart.


When I had all the shelves I needed, I painted the inside all red. It took a few coats as paint doesn't stick to melamine very well, even after cleaning all the surfaces with turpentine. In that respect, covering the outside using varnish glue was a good idea. The only problem it has caused in all these years is that something once stuck to the top and tore a little piece of paper off. I covered the top with clear adhesive plastic to prevent that from happening again.


Monday, November 30, 2020

Smaller upholstery project

I have had this stool for 25 years or so, and considering the time, it was in a fairly good condition, but the leather was worn and I was simply bored of how it looked. So I decided to take it into pieces and replace the leather with something else.


I'm not sure what I expected to find inside, but I was still surprised by polystyrene. I should have known, really, because of how little the stool weighted. So, it was polystyrene inner structure, plastic foam for cushioning, and leather covering.


I removed everything else and started working with the polystyrene structure. I used an old carpet to cover the polystyrene, hand sewing the pieces in place. The filling of the red pillow would become the seat cushion. The green roll is the type of plastic foam you can use under your sleeping bag when you go camping, and it was going to cover the sides of the stool.


Below you can see the green foam in place around the sides. It's main purpose is to prevent dents in the polystyrene. The round piece is an old bed sheet (100% cotton) with pieces of my old jeans sewn into it. I wanted to use the jeans fabric, but I didn't want any stretching, which is why I decided to use cotton as a base for the seat covering.


The rest of the wedge shaped pieces are made of leather. I had this gold-colored leather I bought from the closing sale of a store that sold leather goods, and I had never found any use for it. I originally bought it just because I liked how it looked. I had no plans for it at the time and hadn't had in the over a decade that followed. At least now it got some use. At this point there is a seat cushion under the covering. I made it using the same cotton.


Below are the two parts of the outer layer. I used the jeans for the sides, because I liked the idea of having pockets on the side of the stool. The blue cotton part goes under the stool.


After sewing the two parts together and getting the covering over the stool, I covered the center part inside the structure with the same cotton, because part of it was going to be visible from below. It's just a piece of fabric secured in place by tying some string around it.


Here is the bottom with everything finished. The covering is pulled tight with a piece of string.


Here is the finished stool. The seat cushion seemed a bit too curved first, and I thought I might have to adjust it, but after the stool was used for some time, the filling settled and it is now slightly flatter than in this picture.


Saturday, November 28, 2020

Upholstering an armchair

I upholstered an armchair when I was 18. I had no one to ask for advice, and there was no Internet to turn to, so I had to figure it out all by myself. The result wasn't great, but it served its purpose. 

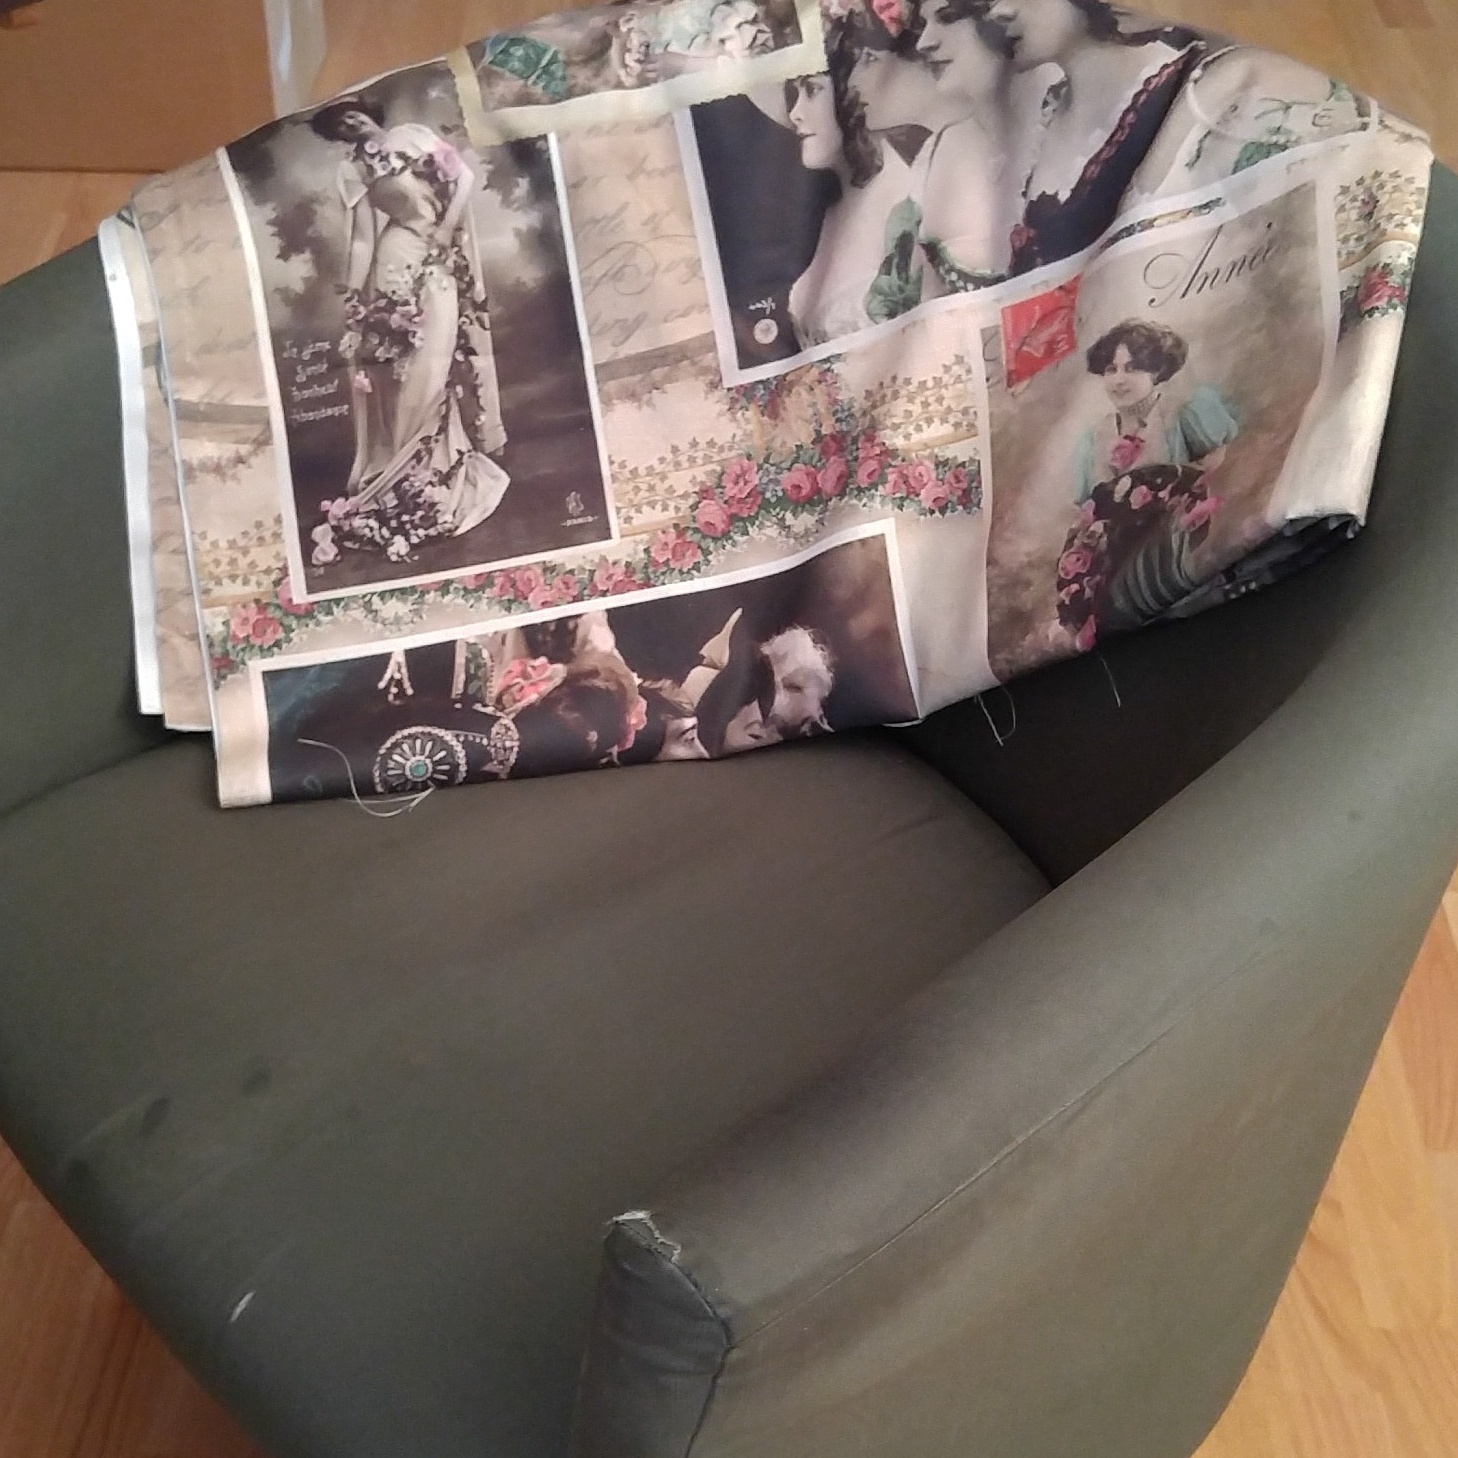
A couple of years back, I decided to try another one as its fabric was worn through in a few places and also had some grease stains. With the one I made over 30 years ago, I used black fabric, so aligning patterns wasn't an issue. With this one, I chose probably the worst possible option, but I really liked the fabric, so I decided to give it a shot.


I cut the fabric by placing it on top of the relevant part and following the seams of the existing upholstery, leaving wide seam allowances. From the beginning, the plan was to leave the original upholstery underneath and just cover it with the new fabric.


The curves of the chair made it hard to sew the fabrics together in the correct shape. I made the curved part too long and then used the narrow front pieces to tighten the fabric. At this stage, I suspected that the upholstery would remain loose in some places.


The following picture shows the structure from below. The curved black part covered the bottom of the chair, so it had to be removed. That required screwdrivers, pliers and a hammer, but I managed to remove all staples eventually.


Below is the fabric in place, the right side out, but not yet stapled to the chair. The good thing with this sort of upholstery is that you can tighten the fabric quite a bit in the stapling stage, but that presents the problem of getting an even tension to all parts of the fabric.


Here's the stapler. I don't remember why I purchased this originally as it was probably 20 years ago or so, but it was perfect for this purpose.


Below is the fabric stapled in place and with excess cut off. It did not remain loose anywhere as I was able to tighten it while stapling it in place with probably more staples than was necessary. If I ever need to remove this upholstery, I'll be regretting that.


The original cover of the seat cushion had a zipper, but I wasn't going to do that for the new cover, so I sewed the cover in place by hand. If it needs to be removed for cleaning, I'll cut the stitches and sew it back again afterwards.


Finally, here are pictures of the finished chair from different sides. I like that fabric so much. When I was cutting it, my main aim was to have the pictures as intact as possible within the panels. The curved seams and the number of panels made this difficult, but I'm fairly pleased with the result nonetheless.