This is the project that started all that repainting, the sewing machine table. I got it when my parents' house was put to sale, and it stood in my living room corner for a year before I got the motivation to do something to it. That was probably a good thing as it had been in a cold storage for some time, so giving it time to dry properly in room temperature couldn't hurt. The photo below shows the table as it was when I got it. Of course I cleaned it right away before letting it stand in my living room for a long time.
The sewing machine wasn't in working condition, so when I started the work on this project, the first thing to do was to remove it and the motor that was under the table. Seriously, that motor would probably have been a fire hazard, if I had been stupid enough to try to connect it.
Here is the table with all the unnecessary parts removed. The veneer in the front edge had suffered from moisture, so that was the first issue to be addressed.
First I sanded the front edge a bit and removed the parts of veneer that were totally loose, and then I got some filler to make the surface as even as I could.
Here is the result after filler and sanding. Not perfect, but I had to choose between leaving it a little bumpy and taking the risk of making a total mess. A little bumpy was the safer option, especially considering the purpose for which this table would be used.
The next stage had to be done in the balcony as there would be rust flying around. All the metal parts needed thorough brushing before painting. I used a wire brush to remove all the rust that I could remove. There was no need to get it all off, because the instructions in the paint can said the paint could be used even on top of rust. However, I wanted to remove everything that was coming loose easily.
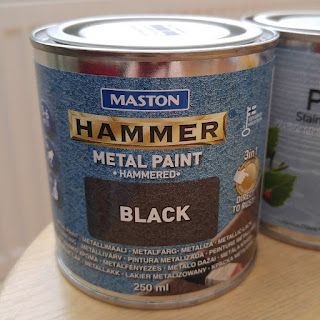
This is the metal paint I used. I knew absolutely nothing about metal paints, but reading carefully the instructions in the can, I thought it sounded right. I didn't want any particular finish, just black color that would stick to the metal.
Here's a little time lapse clip of painting the metal parts.
The result looked nice enough. I applied two coats of paint, because the first one didn't cover everything evenly.
The foot pedal needed to be secured in place, so its front and back would stay off the floor. The original chain was badly rusted, so I bought a new chain and hooks to attach it to the loop in the upper right of the foot pedal. The chain was already black, but the hook needed to be painted.
Here is the table top before painting. It may seem strange to have a table with a hole in the middle, but this was actually perfect for the intended purpose as the space below the table level would hold cables nicely.
Here is the table all painted. You can see the chain here, attached to the foot pedal and going over the lower horizontal bar above it.
The planned use for the table was this. What looks like a radio is actually a dollhouse, and the old sewing machine table made a fitting stand for it. The project wasn't quite finished at this stage, but I'll write another post about the smaller stuff that needed to be done in addition to painting the table.


No comments:
Post a Comment