Thursday, February 4, 2021

Use for the swatches

I mentioned in an earlier post the 5 € batches of fabrics I got from Eurokangas. The latter one contained a set of swatches (in the middle below) with 32 different colors of the same fabric. I figured out what to do with them, so yesterday's project at school was that.


First stage was to cut the swatches to 15x15 cm size and overlock the upper and lower edges of each. Next, I arranged them to three strips of 8 pieces. Then I sewed the pieces of each strip together, ironed the seams, stitched on both sides of the seams, and used an overlocker for the vertical edges.


Then I sewed and stitched the vertical seams to get one big piece, and folded it in half and sewed the side seams.


Here's the other side.


I used a couple of the pieces for making an inside pocket. I used black bias binding as the top edge and handles would be made of black fabric.


The top edge wasn't quite finished as I took this photo, but you get the idea. This bag is for grocery shopping. It is tall and relatively narrow, which means it can accommodate a lot of stuff, but it is also easier to pack things in it so that they will stay upright and won't fall over.


Wednesday, February 3, 2021

The shoulder bag

I finished the shoulder bag yesterday. This time I took several in-progress photos. The first one is after cutting the main pieces needed for the bag. I used one of my existing bags as the starting point, and figuring out the needed pieces and the order of assembly took quite a bit of time. The fabric is called Art Deco Punos and it's sold by Kangaskeskus.


The very first thing I did was attaching one half of the buckle to the underside of the flap. That needs to be done first, so the stitches required won't show on top of the flap. Then I put the flap pieces together and sewed the bias binding to the flap edges. After that, I sewed the flap to the back pieces (two pieces, because the flap couldn't be attached to the top edge due to everything else that needed to be attached there).


There were some parts that had to be assembled separately. The first one was the zipper for closing the bag. The edges of this piece were later sewn to the upper edges of the front and back pieces.


Another separate piece was the inside pocket. This was what led the teacher to give us the exercise of sewing pockets. In the exercise, there was a separate pocket behind the zipper, but in this case there's just a small piece of fabric sewn on the right side, then cut open in the middle and turned to the reverse side to form neat edges for sewing the zipper.


Before the separate pieces could be sewn in place, the sides/bottom (one piece) had to be sewn to the back piece and then to the front piece. I stitched these seams, and the picture below shows the stitching of the latter seam in progress. This was probably the hardest part of the assembly, although not the most time-consuming.


The next photo shows the finished bag. After finishing the previous stage, I attached the other half of the buckle to the front piece, the inside pocket and the part with the zipper to the upper edge of the back piece, the other edge of the latter to the upper edge of the front piece, and the ends of the shoulder strap to the sides. The final stage was sewing bias binding to the upper edge.


Although the fabric is thick upholstery fabric, this bag isn't very sturdy, because it has just one layer of fabric in all other parts except the flap. I thought this was complicated enough for me at this point. I'll probably try making another one with added support at some point, but right now I'm just happy that I finished this.

My biggest gripe with this is the direction of the pattern in the shoulder strap. The strap is 126 cm long, and I had a 140x80 cm piece of the fabric, so I had no choice when cutting the strap. I would have preferred the same direction as in the flap and front, but at least it's the same direction as in the sides. And if the pattern of the strap was upright, the sides should have been separate pieces to get the pattern upright there as well. I wondered why the sides and bottom were separate pieces in the original bag, but maybe this is the reason, although that bag is green all over. It could be that they just used the same pattern as for a bag in which the direction of the fabric matters.

If this had been a mass production, there would have been no problem. The straps would have been cut in the right direction, several of them side by side, so no fabric would have been wasted. As it was a single piece made of relatively expensive fabric, compromises had to be made.

Tuesday, February 2, 2021

Some exercises

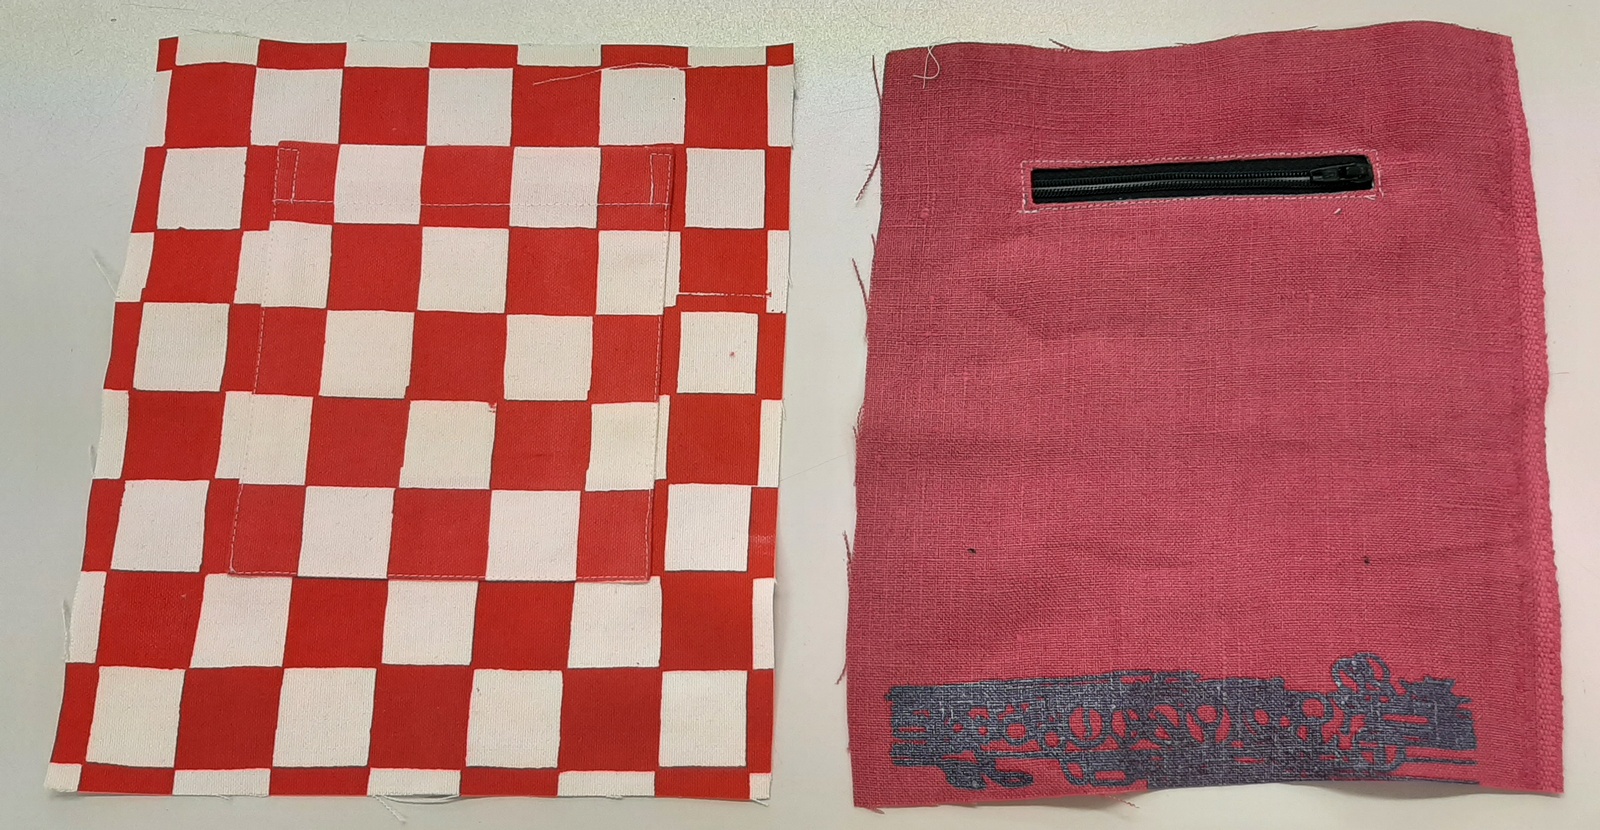
I finally remembered to take pictures of some of the exercises done last week. First one is pockets. And yes, there is a pocket on top of that checkered piece. It's not perfectly aligned, but well enough to make it hard to see the pocket right away. The other one was really an exercise in sewing a zipper. I needed one for the inside pocket in the bag I was planning, so the teacher decided to give us these exercises.


Then we learned how to sew corners as shown in the next picture. It's a good way to sew corners of small table cloths. It took a while to figure out how it is done, but it's not hard once you understand it.


The next exercise was sewing tote bags. I made two. In these, you needed to use at least three different fabrics and sew a pocket on the outside. The green one is the first one I made, and it's bigger, because I made a calculation error and the middle stripe is too high. The other one is really a mixed bag, because I first took the piece with blue stripes and then I had to find fabrics of the same thickness. I kind of like the result, though.


Here's a picture of both bags from the other side.


I have also finished the shoulder bag I mentioned earlier, but that deserves a blog post of its own, so I'll tell about that later.

Sunday, January 31, 2021

Pillow case

The seat cushion of the armchair has flattened so much over the years that the chair is now too hard to sit on. I started using a pillow on it, and the Moomin pillow is perfect for this purpose (it's too flat for sleeping). I was using it as it is, but today I decided it would be a good idea to make a cover for it to make it last longer.


I didn't have a suitable zipper, so I decided to make the cover the same way we made the pillow cases. After all, nobody's going to look under the pillow, just the top of it matters. The photo below shows the parts: top in the middle and the bottom parts on both sides of it. The fabric I used for the bottom parts had some stains (it was from the yesterday's 5 € batch), but as it was similar on both sides, I just turned the pieces so that the stains went on the inside.


First you combine the pieces. I used seam allowances of 1 cm. The sewing machine has measurements marked in it, but I decided to use a magnet just to make sure that the seam is straight. I don't have the kind of magnet that's meant for this, so I just picked a rectangular one from the fridge door.


When you have combined all the pieces, hem the ends, fold the fabric and sew the side seams.


Finally, turn the pillow case right side out and put the pillow inside. In this case, the pillow required quite a bit of reshaping to get the insides spread evenly as the pillow case was slightly smaller than the pillow.


This is probably a temporary solution, and I'll make a better one when I get a long enough zipper. Still, it's a perfectly good way of making a cover for a pillow.

One thing I noticed as I was sewing this is that my sewing machine is slow. I hadn't used it after I started using the industrial machines, so I was surprised by the difference. Today was the first time I set the machine to the maximum speed and pressed the pedal all the way down as I was sewing the long seams. It still felt sluggish.

Saturday, January 30, 2021

What to put inside the duvet cover?

Once we had made the bed sheet sets, we were told that a duvet would be the next project. I've never made one before, so that was interesting. The fabric we used was really difficult as it stretched in all directions, but somehow I managed to stitch it. The colored band shown in the picture wasn't in the original plan, but the sewing machine caused some tearing in the fabric due to the presser foot pressing too hard and that had to be fixed somehow.


The result was actually quite nice, considering it was my first ever attempt at something like this. I'm tempted to try making a full size one at some point.


Today, I went to a fabric store as I was going to the shopping mall where it is. Last weekend, they had this offer for a plastic bag full of fabrics for 5 €. You get a bag and you can pick what you want from a big box of fabrics. The photo below shows what I got that time. I especially like the swatches, because it's the same fabric in various colors, so the pieces are easy to combine.


Today they still had that offer, so I picked some more fabrics, because it's nice to get cheap practice materials. And more swatches, a lot more. The set in the middle has 32 different colors of the same fabric. This week, we were making some shopping bags in which you had to use at least three different fabrics. The structure is quite simple, and the hardest work is combining the pieces to form a 40x90 cm piece for making the bag. I'm thinking that those swatches would be perfect for making a couple of bags. The other swatches here are too thin for that purpose, but I'm sure I'll find some use for them. 


Saturday, January 23, 2021

Stuff done in the past couple of weeks

It's been a busy week, but I'm really enjoying learning about types of seams and how to make patterns correctly. This post is a sort of recap on all the projects done so far (after the pot holders).

First, some things from the previous week, starting with a set of two simple pouches. Basically an exercise in sewing zippers.


After that, we made a set of makeup pouches, and these were much more complicated. Sewing those rounded corners wasn't easy. The two photos below show the sides of the large pouch (26 x 18 cm).


Here is an inside view. We could pick the fabrics ourselves, and I liked having a bit of pink in the lining as well.


The smaller pouch is 14 x 12 cm. Same pattern, just smaller, and the same fabrics as for the larger one. This particular fabric works better in the larger size as the patterns are so big, but it's okay also in this size.


After I had made this set, the teacher asked me to make another set using the same fabric for the outside. That's what I was doing at the beginning of this week. That set will go on sale at the shop at our school later.

The last finished project so far is two sets of bed linen for babies. These are for a charity that collects items for maternity packs to be delivered to Romania. Each set consists of a duvet cover, pillow case and bed sheet.

The first set is made of a full-size duvet cover made by Benetton. The basic design for this small duvet cover calls for a single color reverse side, but as the original had patterns on both sides, so does the smaller version, which can be used with either side on top.


The duvet cover in the second set is made of several stripes to utilize smaller pieces of fabrics. The reverse side has white and light blue stripes, so this one can also be used with either side on top.


After these, we've started making patterns. The next project is making some kind of a bag totally from scratch. Meaning we start by figuring out the structure and making patterns for the bag. I'm taking my Levi's shoulder bag as the starting point and making some changes to it, such as changing the size a bit and probably leaving out the ability to adjust the shoulder strap. This practice piece is going to be for myself, and I haven't adjusted the shoulder strap in that bag in years, so it's the right length as it is.

Sunday, January 17, 2021

The new book is available now

The next Doll Shoe Projects book is now available in Amazon. You can find it by using ASIN B08T7N9M68 or this referral link: https://amzn.to/2M2gPMj. For more information about the book, see the post in the Fashion Doll Shoes blog.