Thursday, April 30, 2009

Real crime in miniature


Not Sleeping
Originally uploaded by Oh so lazy susan

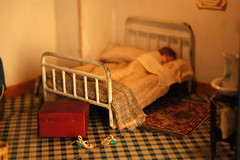
There are actually real miniature crime scenes as well. In Flickr, you can find pictures of the production of Our Wildest Dreams: A True Crime Documentary of Dolls & Murder. The documentary tells about a collection of dollhouse crime scenes used to train detectives.

Murder in miniature

If you want to see really wonderfully made, although a bit gruesome miniatures, you should definitely watch CSI season 7, which has the miniature murders going on throughout the season. Whoever built those roomboxes used in the show is a real professional.

I wanted to get one season of CSI on DVD and as soon as I heard about the theme of season 7, I knew this was the one. It was a bit expensive as I got it new, because I didn't want to risk missing it, but it was definitely worth it. It's two of my favorites, murder mysteries and miniatures, put together, so how could it be anything else than great.

Another form of fictional miniature murders are Margaret Grace's Miniature Mystery books. I haven't read any of those yet, but I am planning to do so. There's a new one coming in October. However, first I need to make some room by selling some of my current books.


CSI kausi 7 suomenkielisellä tekstityksellä

Tuesday, April 28, 2009

Fantasy Villa in 1/24 scale

I added some customized dolls to my web site. They are Lanard's Petite Catwalk Kitties and one of them got transformed from yellow to a black cat while others are less customized.

The actual subject of this post is a 1/24 scale dollhouse I have finally finished. My website has the pictures from halfway through, but nothing from the beginning of the project as I did not have a digital camera at the time. I finally decided to scan the photos I took on those early days. The picture quality is not very good, although the photos were perfectly fine. I guess it is the scanner, but that would not be a suprise as it is about ten years old. Still, it is working and even poor quality is better than no photos at all.

I ordered the house from the UK and it arrived flat packed in a fairly large package. A word of warning, if you hate puzzles and Ikea furniture, this house is not for you. The pieces are laser cut in wood boards and the house is basically a 3D puzzle. I love puzzles, so this was just the thing for me.


After you have taken the boards out of the package, the very first thing to do is to use the pictures on the back of the box to identify and mark all parts. The parts are numbered in the pictures and you should number them in the wood boards in the same way with a pencil. This is essential as you will inevitably end up with a piece you cannot figure out and the numbers will help you find the piece where it is supposed to be attached. The numbering in the pictures was accurate and numbering the pieces myself saved me from a lot of trouble.


The next step is to separate the pieces from the boards. You should sort the pieces into separate piles according to the part of the house they belong to.


After that, I assembled small parts of the house without using any glue. This was just to check that I had understood correctly what goes where and also to keep the relevant pieces together. You should only use glue when you have checked that the assembled part will fit in its place (if it will not, it needs to be modified).


The next pictures show the house with just the walls and part of the staircase in place. The first picture is the view from the back and the other one shows the front.


Even though this is a laser cut kit and everything should be accurate, that is not the case. If you assemble the house without any modification, it will be nice, but there will be gaps here and there. It will be much better with some extra effort. For example, I decided to electrify my house and you can see the copper tape in the picture below. I had only done this once before for a 1/12 scale house, so it was a bit challenging, but quite manageable. Another thing is that the house is assembled using a slot and tab system. I decided to cut off quite a lot of those tabs and fill the holes designed for them where necessary. This makes assembly a bit harder because you need to glue a lot, but the end result is much nicer. I also filled any gaps between parts that would have been visible in the finished house.


There is one flaw in the design of the house and that is the missing piece of floor under the staircase going to the attic. I added that myself as you can see in the next picture. It was quite easy as I could cut the piece from the wood boards left over after removing the pieces.


Then it was just painting and wallpapering and those pictures can be found on my web site,

The finished house looks like this.


Building this house was fun and I'm sure kids would love the house even if assembled as it is intended. I just wanted something even nicer and also, I did not want to get it done too quickly as the building is the best part for me.

About those leftover pieces I mentioned, you should definitely save them as they have all sorts of interesting shapes and can be used for making your own furniture for the house. There is also a FURNITURE SET that will fit this house. I have got that one and the furniture size is also suitable for 1/16 scale houses such as Lundby. Another thing you should save is the box as it is invaluable as a reference, especially if your project takes as long as mine (the house was sitting on the shelf for months at times when I did not have time for it).

The name of the house is FANTASY VILLA SET and it is available in Amazon at the moment. I noticed that they also have the GOTHIC HOUSE SET, which was the other house I was considering when I got this one.

Sunday, April 26, 2009

Card weaving

You don't need special equipment for card weaving. I'm using cards I made from normal playing cards and two small clamps, which can easily be attached to a shelf or table.

The cards are easy to make. You need to cut cardboard squares, draw diagonal lines from corner to corner and draw a circle using the point where the lines cross as the center point. The circle should go near the sides of the square. Then you make holes just inside the circle in places where a diagonal line and circle meet. A hole puncher is perfect for making the holes. Finally, round the corners of the cards. The picture below shows the lines, circle, holes and rounding of corners.


I don't remember anymore where I found this piece of information, but it was very useful as I was getting desperate with the first set of cards I made, because they didn't turn correctly. When the holes are placed as described above, the corners of the cards won't snag the threads, provided there is enough tension.

For basics, see Basic Tablet Weaving. That will help you to get started. For more information, you could see Candace Crockett's book Card Weaving. I have found it very useful for getting to know more than just the basic techniques and patterns.

Below is a small video clip of a card weaving project where I'm using sewing thread for making miniature bands for a doll project.


New blog for other projects

I was updating my home page, but I really don't like editing HTML code, so I decided to start a new blog for all of my other projects that do not fit the doll shoe blogs.

To start it off, here is a link to some of my doll clothes patterns. There are three patterns for Blythe and a coat pattern for a Pipos Baha Cat doll.


Pipos Baha Cat doll