I wasn't quite sure what to expect as I started removing the head from a Monster High Ghoulia doll. I did it with that small screwdriver you can see in the photo. The construction turned out to be similar to Barbie's. The only reason for that odd round knob seems to be that Monster High dolls have such a thin neck that the post could not be attached to it without making that part thicker.
 Next, it was time for the hair to go. I cut the hair as short as possible and then used the wide tweezers to scrape the inside of the scalp to pull the hair in. When everything was inside the head, I used the other tweezers to pull it all out (those tweezers are easier to use as you press to open them, so their "default position" is closed).
 After removing all original paint using acetone, it was time to apply some new. I used Folk Art's acrylic paints and mixed the different shades myself.


 I had thought that I would do a reroot, but I came across the perfect yarn for her hair and it was too thick for rerooting (or at least I couldn't figure out how it could be done). So, I used a sewing machine to sew the strands together for easy gluing. It's fairly easy when you arrange the strands on top of baking paper and sew at least twice across them. When finished, you just need to rip off the paper (by this time, it will have so many holes in it that it will be easy to remove).
 I used three strips: back, front, top. The top one is sewn from the middle to make a parting. I used PVA glue to glue the hair in place as it has worked with a smaller doll I customized earlier. If it won't hold, I'll use super glue to glue it back. Even if I have to resort to that, the first gluing won't be a waste of time as I expect super glue to work better when there will be a smooth surface (the PVA glue strip in the hair) against a smooth surface (the vinyl).
 And here Ghoulia impersonates Cousin Itt as she waits for the glue to dry.
 Finally, photos of the finished doll. She's wearing a business suit for now as I haven't yet made her outfit. The boots are the ones I made for Draculaura a while ago.
I haven't been posting anything here, but I haven't been entirely idle. There are photos on my Flickr account on stuff I've been making during my absence and I thought I could post an overview here.
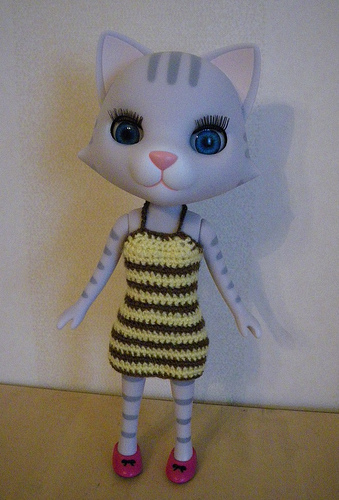
Bobo and Nikki got some crocheted dresses:
I got Robert Tonner's 11" Miss Piggy and made some clothes for her. You can find the patterns for these on my website.
I am also in the process of customizing a Bratz Boyz doll. He will become a feline and has already had his hands and head replaced, although the head is not ready yet.
And finally, I've been making some 1/6 scale furniture, for example, a chair for Monster High dolls.
As the cartridges for my old color printer would have cost more than an entirely new machine, I bought a HP Deskjet 1050 all-in-one. It replaced not only my old printer, but also the scanner.
Among the first items I made with it are these 1:6 scale printables from Jim's Printable Minis.
I also wanted to test the new scanner, so I scanned some of my magazines for 1:6 scale. Vogue had a black back cover, so I didn't scan it, but the others have the back cover as well.
I also scanned my crossword book and a cardboard package of chocolate and resized them to 1:12 scale.
I made a miniature version of Thomas Malory's "Le Morte d'Arthur" with Aubrey Beardsley's illustrations. I made a smaller version first as it didn't need as many inside pages as the 1:6 scale version. The miniature version has a few pages from the beginning of the book, selected by how they would look in small scale, and about dozen pages starting from the first page of Chapter 1, which is the right side page here.

The inside pages are black and white (except the left side page here, which is grayscale), so I printed them with a laser printer on regular copy paper. Laser printer meant there was no need for fixative for these pages.
The cover was printed on cardstock. It looks a bit worn as I scanned the separate paper cover rather than the covers of the book. The book is so big that it was easier this way. The light parts of the cover are gold colored and that doesn't seem to print very well.
I have asked the current copyright holder, Random House UK, for a permission to make the files for this miniature book available for others. If I get the permission, the files will become available on my web site at some point.
My latest doll purchase is Doll Factory's Pet Ari 2nd Edition Bobo. She's a very small BJD doll, but as she is a mouse, she fits in well with the Baha Cat.
Before she even arrived, I started making her some dresses using Mattel's Kelly/Shelly doll as their measurements are almost the same. Bobo is more pear shaped, though, so the dresses had to be loose at the hips.
Here are pictures of dresses I have made for her. I used the same pattern for all of them and just varied the fabrics and decorations. The pattern is available as a PDF file on my web site.
Dress with an iron-on picture:
Wool fabric with a felt flower in front and cotton yarn on the edges:
Slightly shortened pattern and lace added to the hem: