Friday, December 11, 2020

Using an old shirt as a pattern for a new one

One of my favorite shirts was coming to the end of its useful life. There was a huge hole in the left sleeve, and I didn't see a way to fix it, so I decided I'd rather use the shirt for making a pattern for a new one.


I cut open all the seams and got confirmation for what I had been suspecting. I always thought the seams were a bit twisted, and folding the front piece in half showed me that it was the case. This meant that I had to make the patterns as halves, so I cut from the fold and kept the wider half, which I cut a bit narrower while straightening the side.


Here are the pieces I used as patterns. The back piece needed straightening as well, because it was just as twisted as the front.


Here are the new front and back. The pattern in the fabric would have been very hard to align at the edges, so I just made sure they were aligned vertically, that is, the colors matched at the seams.


I even matched the colors in the sleeves. I could have saved some fabric by not doing this, but I wanted the sleeves to be identical. I have seen shirts on sale for which this has not been done, and I think it's just lazy (unless it's part of the design).


I'm not good at getting the sleeves right, so I decided to assemble the shirt in slightly wrong order. After sewing the pieces together as shown in the photo below, I sewed all the side seams. I sewed them from the arm pit to wrist and arm pit to waist, so it was four seams. At least the arm pit seams are extra strong as the seams overlap there for a bit. 


My sewing machine is Pfaff Passport 3.0 and has the following stitches. I used number 15 for combining the pieces and number 12 for all the edges where the fabric was folded. 


Here is the finished shirt. It's the right size and feels very comfortable, so I'd say it's a success. And now I have the patterns for making more of these, if I want (if I happen to find some nice fabric I want to make into a shirt).


Wednesday, December 9, 2020

Building a miniature photo shoot set

Many of the photo shoot sets for the 6th Scale Stories are in my bookshelf.  However, I use some temporary sets that I build up for a photo shoot and take down right after. I decided to use some leftover pieces to build an easily movable platform for doing this. The left wall is the top of a bathroom cabinet, the right wall is a couple of pieces from my bookshelf, and the floor is a piece of particle board (the longer piece) and a piece from my bookshelf.


The pieces are attached together with angle irons and the structure has wheels on two sides, so it can be turned to have a smaller floor and higher walls.


Here is one set ready for shooting photos. There is a separate piece of board on the floor to make it square as I did not have a suitable piece to add to the corner, so the actual structure's floor remains L-shaped. This set is one end of Twyla's (or her late grandfather's) study. The fireplace is embedded into the wall where the arched hole is, so it is fairly deep and has a small led light under pieces of wood for fire. The wallpapers are attached to pieces of cardboard, which in turn are attached to the walls with clamps.


Below is a final photo shot using this set (from Hitman Revisited). The idea is the same as in shooting movies, you crop the picture to leave out anything that tells you this is not a whole room. I've got another set of furniture for the other end of the study, and there's slight overlap in the middle to enforce the impression that it is one room. The carpet also gets turned 45 degrees to left when setting up the other end of the room.


Tuesday, December 8, 2020

Chairs repainted

I thought I had gone through all of the repaints, but there were still some photos of chairs I painted at the same time as all the other stuff. It's amazing how much I could get painted with three small cans of paint.

First, there is this kitchen stool that's at least 20 years old, maybe older, but didn't really look like it. The only thing showing age was the slightly worn varnish on the steps and the top level. However, I wanted to take the opportunity to paint it as I was painting other furniture.


Then there were these two chairs. Not quite as old as the kitchen stool, but more worn. There's so much light colored wood in my home that some variety doesn't hurt, so these ended on the list of items to be painted.


Here is the painted kitchen stool. I used the same paint as for the sewing machine table. You couldn't really guess the age of this now, as good as new.


For the other two chairs, I used a colored varnish, which required way too many coats to look nice, but finally it got to the point where I was satisfied with the result. Here they are drying after the final coat of varnish. 


Then there was also this small table. The table top was in a fairly bad condition, so it needed painting, this wasn't just because I fancied a change. I didn't bother to paint the legs, because it would have been a bit complicated as this is a folding table. It was complicated enough to varnish the folding chair in the picture above.


Monday, December 7, 2020

How to keep acrylic paints usable

I was looking for suitable color for one of my current projects when I realized I hadn't checked the acrylic paints for a couple of years. They are easy to keep usable, if only you remember to check them regularly.


The first thing to do is to get a bottle open. Usually it's enough to open the lid (the upper part of the top that covers the small hole on the top) to let some air in, if you can't get the top to turn. Once some air gets in, the top should turn more easily. If not, you can try using a kitchen towel to get a good grip. This time I had a couple of bottles really badly stuck, and I found out that the sort of cleaning pad shown in the next picture is quite useful. The rough side gives much better grip than a towel.


Once the bottle is open, take a long, thin stick. I use a screwdriver, because metal is easy and quick to clean before using it for the next color. Stir the paint to get an idea of how thick it is. If it looks normal, just stir well, close the bottle again and shake it a few times. If it's thick, add some water, close the bottle and shake vigorously to mix the paint and water. The amount of water depends on how much paint there is and how thick it is. You can add the water a little bit at first, shake, then check, and add more if needed.


If the grooves inside the top have a lot of dried paint in them, clean the inside before closing the bottle again. A screwdriver is good for this purpose as it is easy to scrape the paint away with it and its tip fits the small grooves.

If you've got bottles with so little paint left that it's not worth the trouble, you can clean the bottle and use it for mixing your own shades. In the first picture of this post, the second bottle from right is that kind. I remove the label to distinguish these bottles from original colors, and usually also write the purpose of the mixed color in the bottle, so I'll remember later why I mixed it.

To clean a bottle, put it and the top into warm water and let soak for a few hours. Then you should be able to remove the label easily. Rinse the bottle thoroughly, and if there is paint still left, fill it about half full, close it and shake well. This should remove at least some of the remaining paint. Repeat as many times as necessary. If paint is still stuck, let the bottle soak in warm water longer, overnight if necessary.


Removing the label tends to leave the bottle's sides a bit sticky, but that's just a nuisance, so I haven't tried to do anything about it. Solvent would remove the remaining glue, but I'm not sure what it would do to the plastic, so I just leave the bottles as they are.

Sunday, December 6, 2020

Additional parts for the table

The sewing machine table had a small wooden drawer under the table top. It was falling into pieces as all the corners were loose and only the bottom was keeping it together.


The first thing to do was gluing the corners with PVA glue. I left the original nails in place, tapping them in with a small hammer. I didn't think they would be much use otherwise, but they would help the pieces to keep their original alignment while the glue was drying.


The rails for the drawer under the table were also a bit broken. I could have made new ones, but I decided to try fixing these first and only make new ones if I had to.


The composite picture below shows the different stages of fixing the rails: filler applied (pictures 1 and 2), shaping the rails by sanding (pictures 3 and 4), and finally the result (picture 5), which isn't perfect, but works.


After everything was ready, the parts needed painting. It never stops amazing me what you can do with filler and then paint the result, and nobody can guess what's underneath.


Another issue was hiding cables. The dollhouse and table look so nice that it would be a shame to ruin the impression by having a bunch of cables lying around. The answer to that problem was using some leftover pieces to build a cover under which all the cables that don't fit in the space under the table can be hidden. The cover is made of pieces of wood and particle board glued together using PVA glue.


I painted the cover black, using what remained of the metal paint. It's not meant for painting wood, but it was available and I didn't want to throw away what was left. I always prefer using leftovers for other projects. When the paint was dry, I attached some stickers for decoration. Those were the only pieces I bought specifically for making the cover, everything else was leftover materials. In the photo below, you can see the cover as it looks seen from the front.


Here's view from the back. The back is open to allow access to the extension cord's power switch. The cover is taller than is needed for accommodating the cord and cables, but that is for ventilation. In a smaller space, the cables could get hot. Even with the extra space, I wouldn't recommend leaving the power on for an extended period and certainly not unsupervised. This works for the purpose it's used here, because the dollhouse lights are never on when I'm not at home.


Saturday, December 5, 2020

An old sewing machine table

This is the project that started all that repainting, the sewing machine table. I got it when my parents' house was put to sale, and it stood in my living room corner for a year before I got the motivation to do something to it. That was probably a good thing as it had been in a cold storage for some time, so giving it time to dry properly in room temperature couldn't hurt. The photo below shows the table as it was when I got it. Of course I cleaned it right away before letting it stand in my living room for a long time.


The sewing machine wasn't in working condition, so when I started the work on this project, the first thing to do was to remove it and the motor that was under the table. Seriously, that motor would probably have been a fire hazard, if I had been stupid enough to try to connect it.


Here is the table with all the unnecessary parts removed. The veneer in the front edge had suffered from moisture, so that was the first issue to be addressed.


First I sanded the front edge a bit and removed the parts of veneer that were totally loose, and then I got some filler to make the surface as even as I could.


Here is the result after filler and sanding. Not perfect, but I had to choose between leaving it a little bumpy and taking the risk of making a total mess. A little bumpy was the safer option, especially considering the purpose for which this table would be used.


The next stage had to be done in the balcony as there would be rust flying around. All the metal parts needed thorough brushing before painting. I used a wire brush to remove all the rust that I could remove. There was no need to get it all off, because the instructions in the paint can said the paint could be used even on top of rust. However, I wanted to remove everything that was coming loose easily.


This is the metal paint I used. I knew absolutely nothing about metal paints, but reading carefully the instructions in the can, I thought it sounded right. I didn't want any particular finish, just black color that would stick to the metal.


Here's a little time lapse clip of painting the metal parts.


The result looked nice enough. I applied two coats of paint, because the first one didn't cover everything evenly.


The foot pedal needed to be secured in place, so its front and back would stay off the floor. The original chain was badly rusted, so I bought a new chain and hooks to attach it to the loop in the upper right of the foot pedal. The chain was already black, but the hook needed to be painted.


Here is the table top before painting. It may seem strange to have a table with a hole in the middle, but this was actually perfect for the intended purpose as the space below the table level would hold cables nicely.


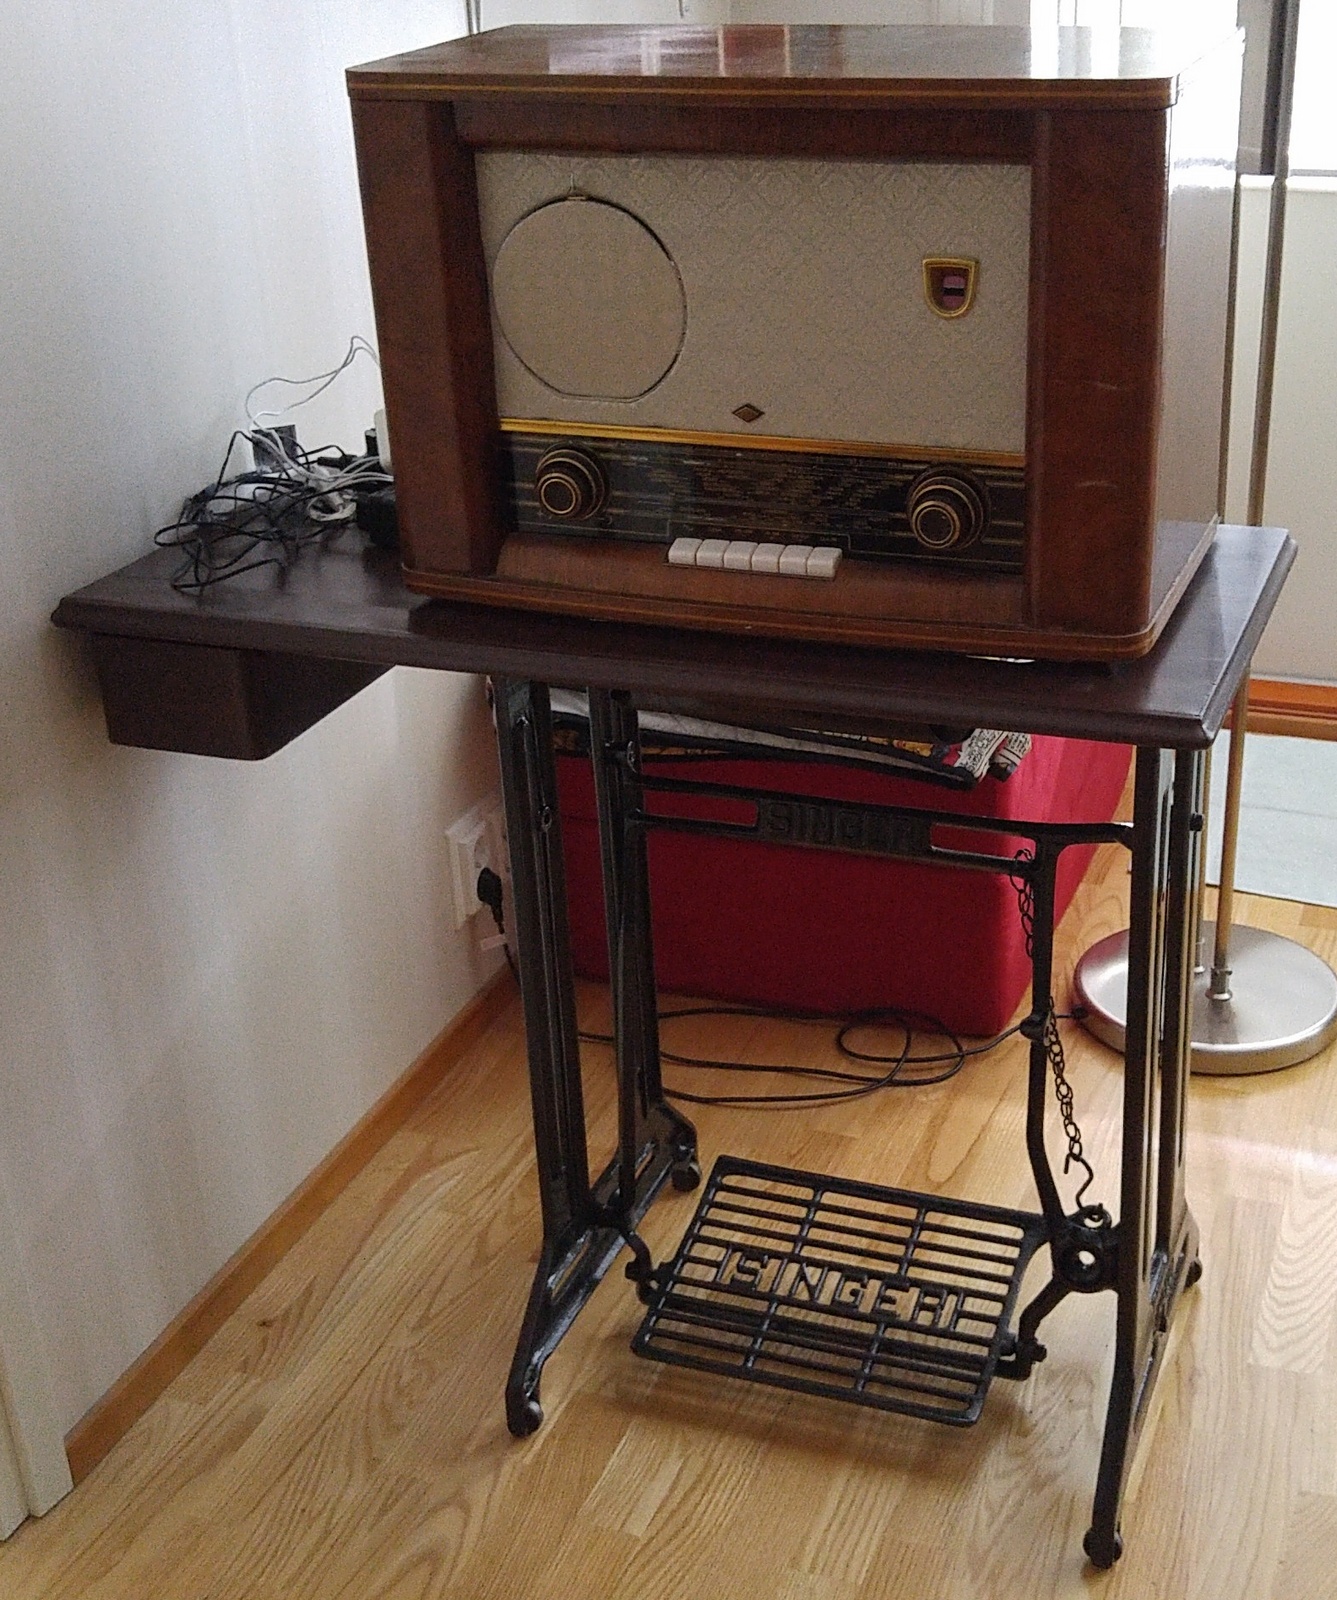
Here is the table all painted. You can see the chain here, attached to the foot pedal and going over the lower horizontal bar above it.


The planned use for the table was this. What looks like a radio is actually a dollhouse, and the old sewing machine table made a fitting stand for it. The project wasn't quite finished at this stage, but I'll write another post about the smaller stuff that needed to be done in addition to painting the table.


Friday, December 4, 2020

Repainting a small drawer

Here's another piece I repainted. I bought this new and used it as it is for some time, but decided to give it some color when I was painting all the other stuff.


I painted the insides of the drawers white, the visible outside parts red, and the rest of the outside parts white. I wondered if I was going too far with painting sides that wouldn't be visible, but apparently it's a good idea to paint all sides to prevent any warping.


I didn't paint the inside parts of the frame, because I didn't want brown streaks on the white parts, and that would have happened at some point.


After painting, I applied some stickers to the front of the drawers.


And here is the final result. The combination of red and brown works quite nicely, although it was brought on by the fact that those were the colors I had available. Of course this, the box on the back and the other small drawer under this one also fit together nicely when the color scheme is the same.